Load Test (Java API)
This tutorial provides a brief introduction to the Java API load testing module of the AppPerfect Load Test using a set of hands-on practice exercises. This tutorial assumes you have successfully downloaded and installed AppPerfect Load Test on your machine with the default options. Apart from this pre-requisite, this tutorial is self-contained. Instructions given below are Linux-specific.
This document is divided into following sections
Within each section, multiple exercises are listed. Each exercise forms a logical unit, which is expected to take no more than a few minutes to perform.
All exercises assume you have installed the product in /AppPerfect/LoadTest folder and will be referred as LOADTEST_HOME henceforth in tutorial. If you have installed the product in some other folder, modify the instructions below appropriately.
This tutorial is not intended as a comprehensive training guide. Please refer to the product documentation for detailed information. However, this tutorial will give you a very good overview of the products and substantially improve your productivity with the product.
Creating Common Project
In AppPerfect Load Test, you can create a common project and use the same project to perform tests in all the bundled products.
Exercise 1: Launch AppPerfect Load Test
- Click on Start -> Programs ->AppPerfect Load Test x.x.x -> AppPerfect Load Test
- On launching AppPerfect Load Test a Welcome page will be displayed. Go through various sections provided in the welcome page.
NB: Welcome page is displayed only when Load Test x.x.x is launched and last time no project was opened.
Exercise 2: Creating a Common Project
- Launch the Project Wizard by clicking File ->New... menu option. The New Project wizard will be launched.
- Keep the default project name and location for the purpose of this exercise. Click on the OK button.
- A confirmation message saying that the project is saved will be displayed. Click on the OK button.
Now using this project we will create tests to demonstrate the functionalities of AppPerfect Load Test product.
Load Test Java APIs
NB: Please follow the steps provided in the "Creating Common Project" section to first create a project, then proceed further.
Exercise 1: Define a Load Test project
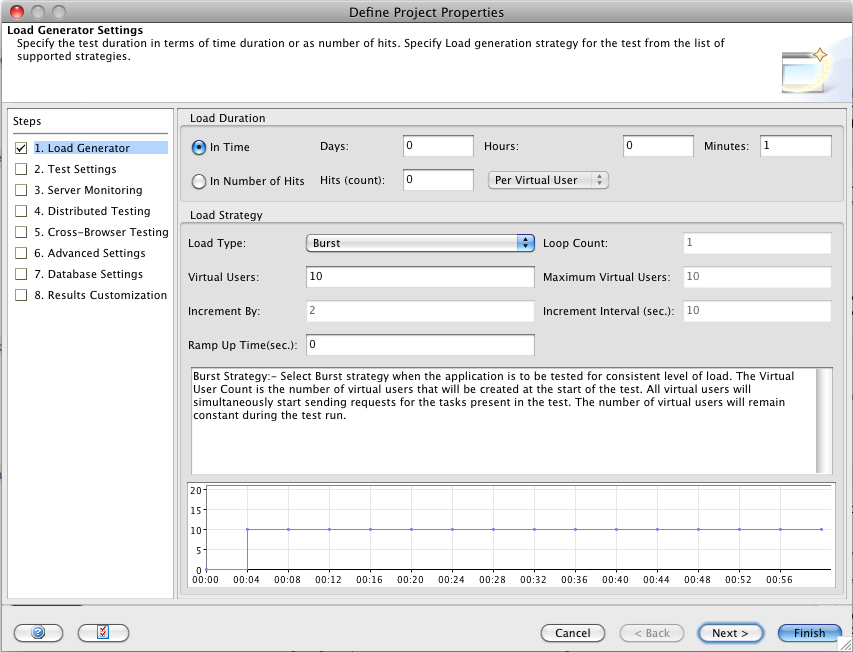
- Once the project is successfully created another dialog - Define Project Properties dialog - will be displayed.
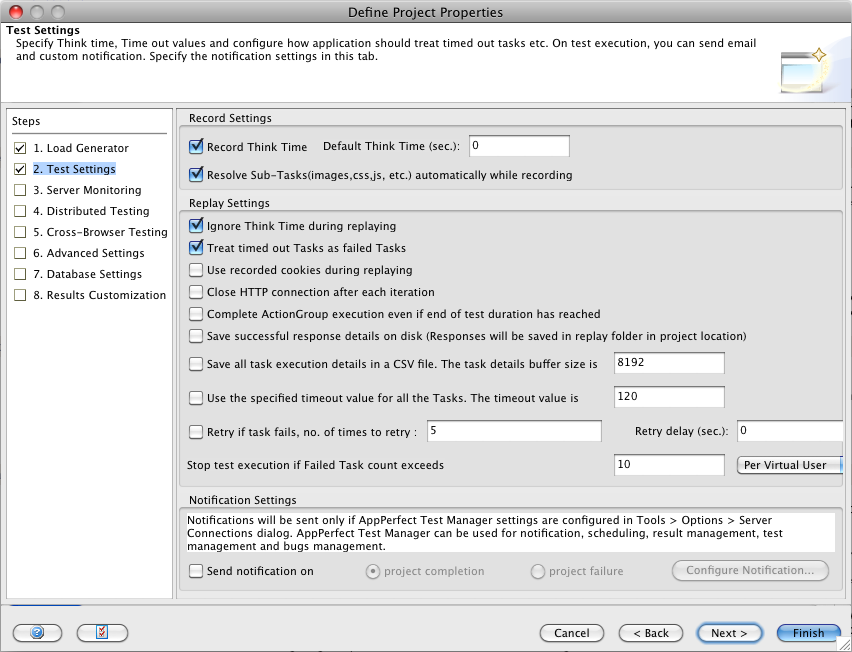
- Select Test Settings tab.
- Select the checkbox "Complete Action Group execution even if end of test duration has reached".
- Review other settings in the Panel and click on the OK button to close this dialog.
- In the Editor tab, select the NewProject node. On the RHS-bottom, Change the execution behavior to Starting Group (Once at Start), Action Group(s) (Repeat for test duration), Ending Group (Once at End).
- We have configured to run the test that Staring Group will be executed only once at the start, then Action Group will be executed till the end of the test duration and then in the end Ending Group will be executed once.
Exercise 2: Adding Custom jar to Test execution classpath
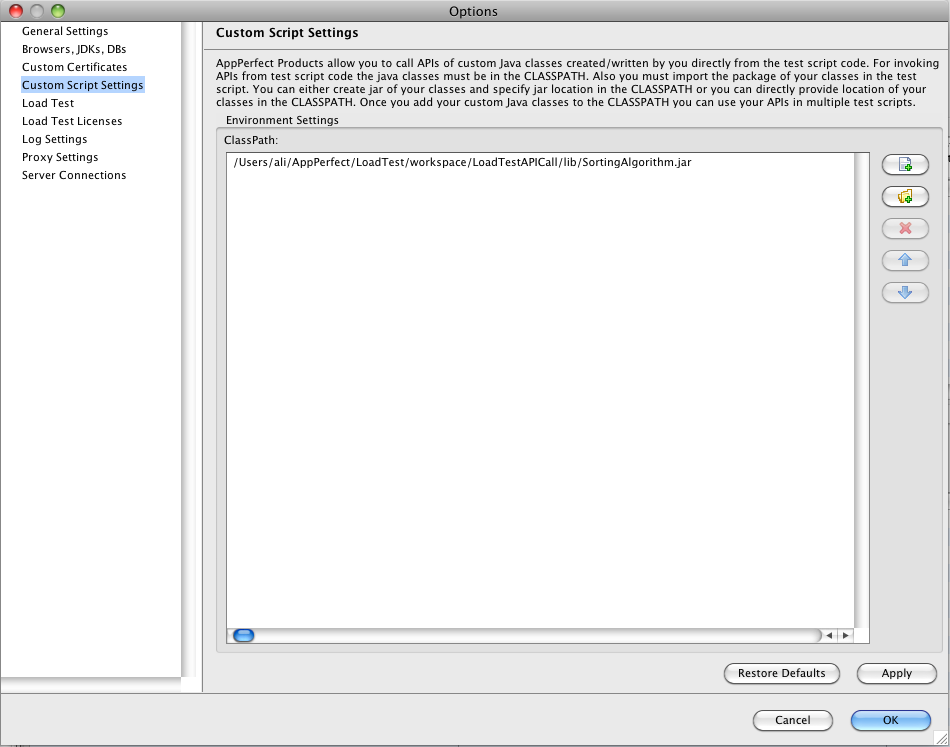
- Select Tools > Options. Options dialog will come up.
- Select Custom Script Settings tab.
- AppPerfect Products allow you to call APIs of custom Java classes created/written by you directly from the test script code. For invoking APIs from test script code the java classes must be in the CLASSPATH. Also you must import the package of your classes in the test script. You can either create jar of your classes or specify jar location in the CLASSPATH or you can directly provide location of your classes in the CLASSPATH. Once you add your custom Java classes to the CLASSPATH you can use your APIs in multiple test scripts
- Add the path of the jar file, which contains the classes whose APIs, will be called in the script. For this tutorial add SortingAlgorithm.jar to the classpath. It have classes com.appperfect.util.BidirBubbleSortAlgorithm, com.appperfect.util.BubbleSortAlgorithm, com.appperfect.util.QSortAlgorithm with a method sort(). We will be creating task for this Java API to Load Test.
- Select Ok to save the settings.
Exercise 3: Adding a Task manually
- Select ActionGroup1 and rename it to BubbleSort by changing value of Group Name in Right Hand Side tab.
- For Adding a New Group:
- Right click on Project node.
- Select Add Group
- This will bring a dialog to add group details manually.
- For Adding a New Task in Group:
- Right Click on Group Node.
- Select Add Task
- This will bring a dialog to add a task manually.
- For Adding script in Task:
- Right click on Task node.
- Select Script Editor
- This will open script editor with script function of selected task.
- Add a new task name as BubbleSort in BubbleSort Group by following point no 3.
- Specify timeout as 30 secs and Response code as 200.
- Now click Ok
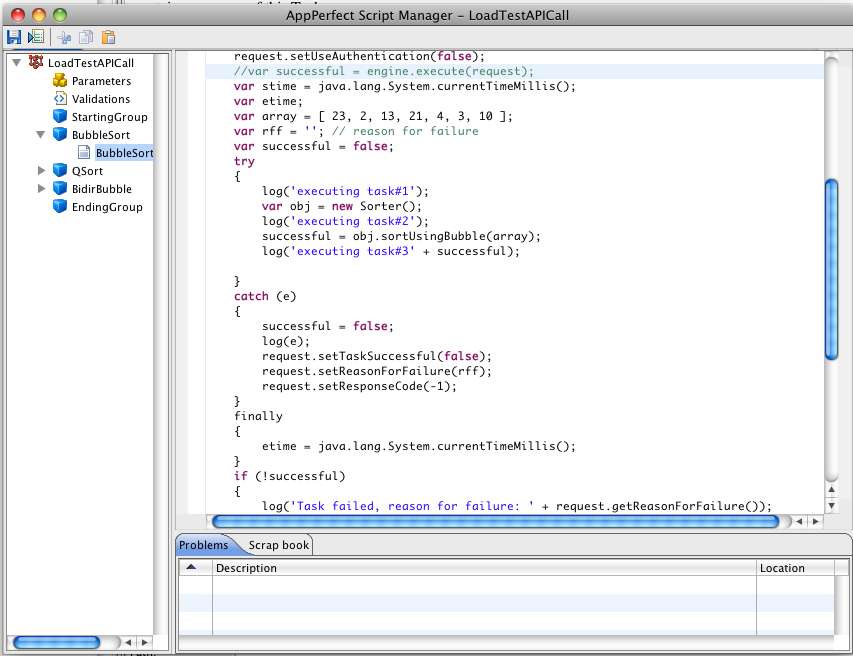
- Add below script in this task by following point no 4.
- You will see the Script Editor. Move to the topmost line which is
var engine; //Variable to store instance of ScriptEngine Instance - Insert following lines above this line:
- importPackage(Packages.com.appperfect.util);
- importPackage(Packages.java.lang);
- In Script Editor tree, expand BubbleSort Group and select BubbleSort[/] task.
- We will see the script of the task that we added manually on the RHS.
- Click the cursor on line:
var successful = engine.execute(request); - Comment this line and insert the following code after this line:
	var stime = java.lang.System.currentTimeMillis();
	var etime;
	var array = [ 23, 2, 13, 21, 4, 3, 10 ];
	var rff = ''; // reason for failure
	var successful = false;
	try
	{
		var obj = new Sorter();
		successful = obj.sortUsingBubble(array);
	}
	catch (e)
	{
		successful = false;
		log(e);
		request.setTaskSuccessful(false);
		request.setReasonForFailure(rff);
		request.setResponseCode(-1);
	}
	finally
	{
		etime = java.lang.System.currentTimeMillis();
	}
	if (!successful)
	{
		log('Task failed, reason for failure: ' + request.getReasonForFailure());
	}
	else
	{
		request.setResponseCode(200);
		request.setTaskSuccessful(true);
		request.setResponseTime(etime - stime);
	}
Exercise 4: Executing a test
- Save the Test and Run the test.
- Open LOADTEST_HOME\logs\script_log.txt file to check the messages getting logged in it.
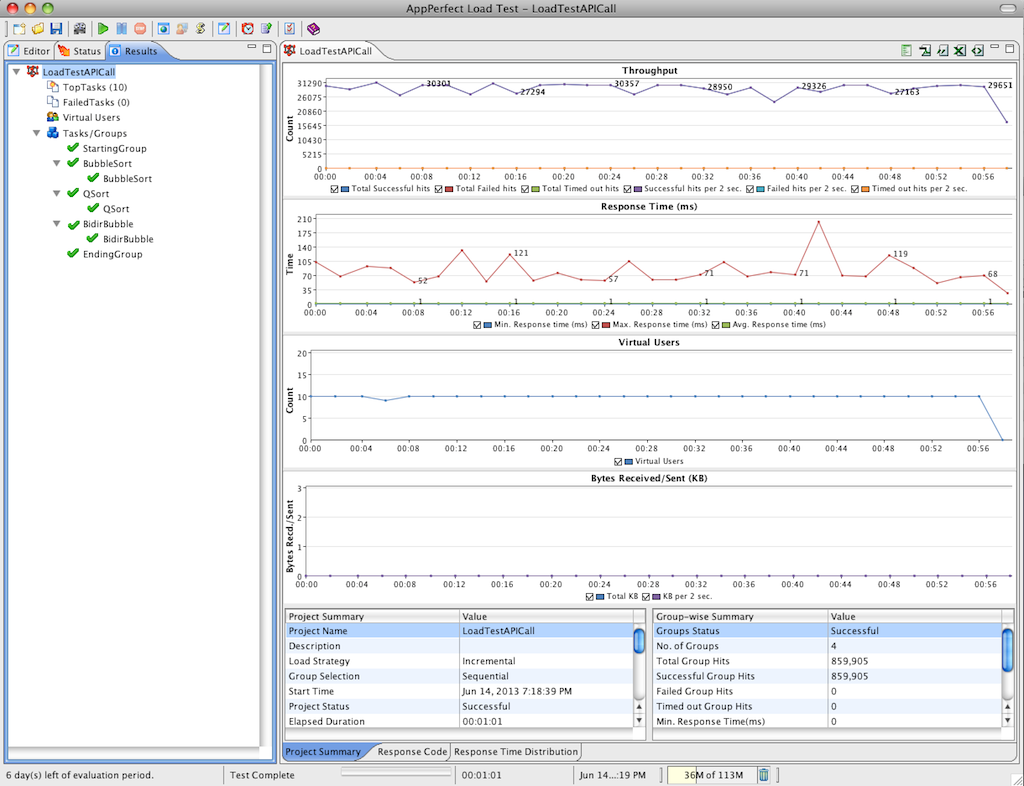
- Once the test is complete, you will see the results of each task. Response times are those of the API calls.
